Defrosting is an essential step to ensure that your freezer is optimally maintained and that the food stored inside is still within the prescribed freshness date. It is often one crucial task that can take a big chunk of our time due to the number of steps involved. So is there a way to quickly defrost the freezer? We took on the topic, and below is an account of what we found out.
Planning ahead of time can help cut down the overall time spent in defrosting your chest freezer. Ideally, it is better to time in your defrosting to have the least amount of food stored inside. Follow the steps below to defrost your freezer:
- Remove all remaining contents inside the freezer, including baskets or other compartments.
- Turn off and unplug the freezer.
- Remove the drain plug and attach the drain hose adapter with the drain hose.
- Remove the frost build-up.
- Drain the water and other melted ice, consequently drying the freezer compartment.
- Remove the drain hose and replace the drain plug.
- Return the baskets or plastic compartments and turn the freezer on after re-plugging.
For a more detailed written guide, continue reading as we expound on the prescribed steps. We've also included a video below to help visual learners out there.
NOTE: WE MAY GET A COMMISSION IF YOU DECIDE TO MAKE A PURCHASE THROUGH THESE LINKS. THERE'S ADDITIONAL NO COST TO YOU. CHECK THE BOTTOM OF THE PAGE FOR MORE INFORMATION.
Defrosting A Chest Freezer
On average, defrosting can only take less than half a day from start to finish depending on the size of your freezer and the amount of ice build-up. We have expounded below the 7-step defrosting procedure:
1. Remove all remaining contents inside the freezer, including baskets or other compartments
It is always best to plan before defrosting so that you don’t get stressed about the amount of food you would have to take out of the freezer before defrosting. Food taken out should be immediately placed in more excellent storage areas by either moving them in your fridge freezer if you have space or prepare coolers filled with ice.
It is advisable to take food out in the same order or categorization. You have to return them without disrupting your prior organization efficiently.
For plastic compartments or baskets, take them out early to allow them to come to room temperature.
2. Turn off and unplug the freezer
Refer to your freezer manual to check for specific steps to follow. But overall, once all the contents have been removed, look for the switch to turn off the appliance before unplugging the freezer.
3. Remove the drain plug and attach the drain hose adapter with the drain hose
Make sure to follow this step before the ice melts entirely so that you get to defrost tidily without making any water mess. You can either drain the water coming from the freezer by putting the end of the drain hose into a pail or large basin.
Alternatively, if there is a nearby drain, you can just place the end there to drain the water automatically—no need to throw the water that will accumulate in the pail or large basin.
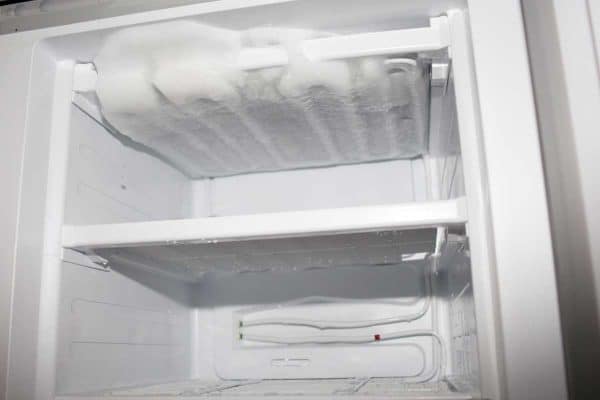
4. Remove the frost buildup
Use a plastic scraper when removing the frost buildup as shown in the video above. Using a knife or ice pick can damage the internal panels. Also, make sure to keep the door open so that ice will melt faster.
The video above also shows a hack to hasten the removal of frost build-up. It's the most commonly used and as simple as placing a bowl of hot water in a container within the freezer compartment. The heat coming off from the hot water will help melt the ice faster and facilitate scraping with your plastic spatula.
Another method to easily remove the ice build-up is to leave the freezer overnight unplugged and then remove the ice the following morning, which would have entirely melted by that time. Or soften the ice using a fan that is directly placed into the opening of the freezer.
Using a hairdryer to melt the ice is not recommended as this can be an electrical hazard.
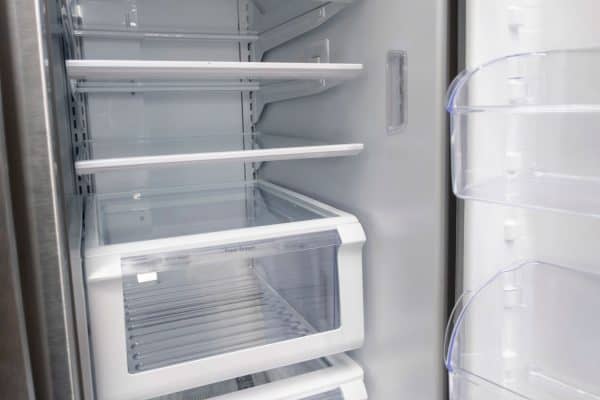
5. Drain the water and other melted ice, consequently drying the freezer compartment
Once all the ice build-up has been removed and melted as well as ice drained, clean the inner compartment, and completely dry the freezer compartment. By this time, you can also wash the plastic bins and dry them accordingly as these would have approximated the room temperature. Washing them immediately after taking them out of the freezer can cause cracking, so they must be acclimatized.
Once all the ice has melted, make sure to wash with some soapy water to clean all the sides. You can also add baking soda if you would like to remove some odors. Rinse with water thoroughly before drying.
Make sure to dry the freezer walls and other attachments. If you place them wet, the remaining water will freeze immediately and contribute to an earlier ice buildup.
6. Remove the drain hose and replace the drain plug
Remove the drain hose set up and plug the drain hole using the freezer drain plug. Make sure not to forget this step, as you don’t want to leave an opening to your otherwise closed freezer system for several reasons. It can be a venue to introduce unwanted elements like insects, dust, or other objects that can find their way inside the freezer.
It can also help to facilitate ice buildup since warm air will find its way to enter. Also, this can lessen the efficiency since more energy will be required to maintain the internal temperature.
7. Return the baskets or plastic compartments and turn the freezer on after re-plugging
Once the freezer is cleaned up, return the baskets and other compartments and turn on the appliance. Then subsequently return the food items in the way that you organize them. Color coding can help to identify the contents based on your categorization. Adding a date can also help you in your inventory management.
How long does it take to defrost a chest freezer?

On average, defrosting your chest freezer will take about a few hours to a whole day, depending on the amount of ice that has developed inside it. Frost build-up can be dealt with within 2 hours up to 24 hours depending on how thick it is.
It is therefore essential that you regularly defrost your chest freezer so that it becomes a painless activity. Longer defrost intervals will also lead to thicker ice buildup and potentially longer defrosting time.
Can you defrost a freezer without turning it off?
It is recommended that you turn off and unplug the freezer when you defrost. Not only do you waste precious energy but keeping it on may prolong the defrosting process.
How often do you need to defrost a chest freezer?
You should at least defrost your chest freezer at least once every 6-12 months or at least when you’ve noted that the ice build-up is ¼ inch thick.
What to do with food when defrosting the freezer?
It is essential to plan so that you don’t stress yourself with the temporarily displaced food while you defrost. It would be worthwhile to have a countdown before defrosting. This is so that you have ample time to reduce your inventory so you might as well try doing the following:
- Strategically cooking those that can spoil or their quality affected quickly when left for a longer period outside the freezer.
- Giving food away if you don’t plan to cook it.
- Disposing of it accordingly in case there were some overstaying stocks.
Those that will be left will either be relocated to your refrigerator freezer or cold storage compartment temporarily. Alternatively, you can set up your coolers to store the food while you defrost. Or you can ask your friendly neighbor to lend you some freezer space for the essential items.
In Summary
Defrosting your freezer need not be a painful experience. Consider it a way to maintain your appliance by increasing its working efficiency, ensuring food quality by mandatory inventory check during defrosting, and overall, saving energy.
So plan your defrosting day. Set aside time for it so that you have ample time to make temporary storage for the food that will be displaced by using either your refrigerator freezer or other potential storage spaces.
You can also browse the following articles to gain more insight regarding your chest freezers:
How to Prevent Ice Build-up in Chest Freezer

![Woman hand open plastic white container drawer in new refrigerator. How To Put A Freezer Drawer Back In [Inc. For Specific Brands]](https://forfreezing.com/wp-content/uploads/2021/09/Woman-hand-open-plastic-white-container-drawer-in-new-refrigerator.-How-To-Put-A-Freezer-Drawer-Back-In-Inc.-For-Specific-Brands-600x400.png)